| BACK
This Page covers installing samba-2.0.9 and is divided into five parts. 2.0.9 was the latest version of the 2.0 series when this page was created on 03 JUN 01 (it is a security update fix for 2.0.8), 2.2.0 is out at this time and compiles the same, the only significant changes would be to the smb.conf file as it has better support for being a PDC for windows clients.
Page uses cascading style sheets causing the images to be misaligned in Netscape browsers.
- Compiling the source
- Configuring smb.conf
- Starting Samba
- Setting up SWAT
- SMBMOUNT
- EMAIL
- Compiling Samba
- As usual obtain the source from samba.org or a mirror site first.
- Save the source in a convenient directory, I made a directory called samba in my user's home directory to hold the source.
   suse:~ # mkdir samba
   suse:~ # cd samba
   suse:~/samba/ #
- Decompress and untar the source
suse:~/samba/ # tar zxvf samba-2.0.9.tar.gz
- Change to the {$source}/source directory. ($source would be /home/admin/samba/samba-2.0.9 in this case)
   suse:~/samba # cd samba-2.0.9/source
   suse:~/samba/samba-2.0.9/source #
- Run the ./configure script with options if needed, none of the options I used are necessary to install Samba. I used --with-smbmount to be able to mount windoze shares on my Linux box and the --prefix=/usr/local/samba is the default location for Samba to be installed anyway so it can be omitted. The --bindir=/usr/bin option installs the user binaries such as smbmount and smbumount in the /usr/bin directory. If you don't use this option the will be installed to {PREFIX}/bin, in this case you will need to have the directory in you path to use the utilities.
 suse:~/samba/samba-2.0.9/source# ./configure \
 --with-smbmount \
 --prefix=/usr/local/samba \
 --bindir=/usr/bin
- Run make to compile the source into binaries
suse:~/samba/samba-2.0.9/source # make
- Run make install to install the system binaries, man pages, etc. If you're installing in the same location as a previous install of Samba then all the old binaries will have .old extensions. You must be root to run make install and install the binaries.
   suse:~/samba/samba-2.0.9/source # su root
   password:
   suse:~/samba/samba-2.0.9/source # make install
- If the compile and install executed without a problem, you can now restart Samba if you have a previous version installed; else you will have to create a file called
smb.conf
- Back To Top
- Configuring smb.conf
- The smb.conf file is located in {$INSTALL_LOCATION}/lib/smb.conf and is not created when you install samba from source. Below is the command to copy the sample smb.conf
file located in the {$source}/examples directory to the needed directory for Samba.
suse:~/samba/samba-2.0.9/examples #cp smb.conf.default /usr/local/samba/lib/smb.conf
- You, of course, will have to edit the file to suit your needs or use the example below for a basic smb.conf to get you started.
   suse:~ # cd /usr/local/samba/lib
   suse:/usr/local/samba/lib # vi smb.conf
- A basic smb.conf file
   # Basic Samba configuration file
   # Created 03 JUN 01
   [global]
      workgroup =  WORKGROUP1
      comment = My Samba Server %v
      netbios name = SUSE

   [homes]
      comment = Home
      browseable = no
      read only = no
      create mode = 0750

   [share]
      path = /share
      browseable = yes
      writable = yes

   [cdrom]
      comment = Linux CD-ROM
      path = /cdrom
      read only = yes
      locking = no
   # End configuration file
If the /share and /cdrom directories don't exist, you will have to create them and apply the correct permissions, I'm using full permissions (777) for testing purposes only. You
will have to mount a CDROM before it can be shared and viewed by clients.
   suse:/ # mkdir /share
   suse:/ # chmod 777 /share

   suse:/ # mount /cdrom
- You can and should test the options in smb.conf by using the testparm utility.
   suse:/share3 # /usr/local/samba/bin/testparm  /usr/local/samba/lib/smb.conf
   Load smb config files from /usr/local/samba/lib/smb.conf
   Processing section "[homes]"
   Processing section "[share]"
   Processing section "[cdrom]"
   Loaded services file OK.
   Press enter to see a dump of your service definitions
              [ Output clipped ]
- Restart the server using one of the steps from the next section
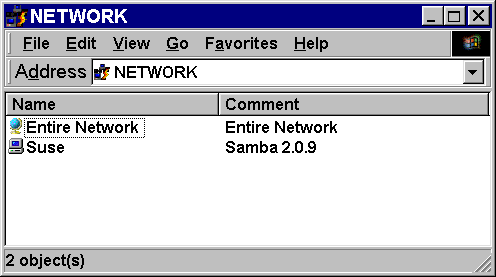
- Samba server as seen in network neighborhood from a windoze 98 client
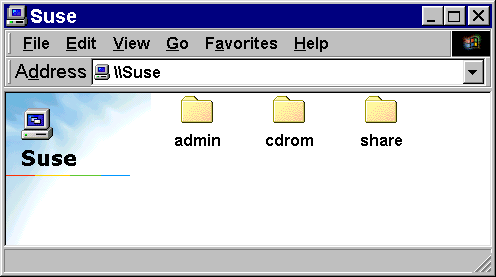
- Listing of the shares on Samba server as seen in network neighborhood from a windoze 98 client
- View the available shares from the command line using smbclient -L {server_name} -U%
 suse:/share3 # smbclient -L suse -U%
 Added interface ip=192.168.1.70 bcast=192.168.1.95 nmask=255.255.255.224
 Added interface ip=209.38.1.1 bcast=209.38.1.255 nmask=255.255.255.0
 Domain=[BELL.NET] OS=[Unix] Server=[Samba 2.0.9]

         Sharename      Type      Comment
         ---------      ----      -------
         share          Disk      My Samba Server 2.0.9
         cdrom          Disk      Linux CD-ROM
         IPC$           IPC       IPC Service (Samba 2.0.9)

         Server               Comment
         ---------            -------
         EARTH2               Computer 3
         SUSE                 Samba 2.0.9

         Workgroup            Master
         ---------            -------
         BELL.NET             SUSE
- Back To Top
- Starting Samba
(re)starting Samba, you have several options
- Use an existing script if Samba was previously installed in the same location, otherwise edit the script accordingly.
suse:~ # /etc/rc.d/smb restart
- Start the Daemons from the Command Line.
   suse:~ # /usr/local/samba/bin/smbd -D
   suse:~ # /usr/local/samba/bin/nmbd -D
- If Samba was previously installed in the same location and starts automatically, you can simply reboot.
suse:~ # /sbin/shutdown -r now
- If you need a script copy the following lines into a file called samba in the /etc/rc.d directory, make the file executable(chmod 700 samba), and execute it explicitly from the command line (suse:~
#/etc/rc.d/samba).
   #!/bin/sh
   #Script for starting Samba 2.0.9
   #Created 03 JUN 01

   if [ -x /usr/local/samba/bin/smbd]; then
   echo -n " Starting Samba 2.0.9 "
      /usr/local/samba/bin/smbd -D
      /usr/local/samba/bin/nmbd -D
   fi

   #End of Script
- If you want to kill the Daemon manually use the following commands to first get the pids and then kill them.
   suse:~ # ps x | grep smbd
   9220 ?        S      0:00 /usr/local/samba/bin/smbd -D
   suse:~ # ps x | grep nmbd
   9216 ?        S      0:00 /usr/local/samba/bin/nmbd -D
   suse:~ #kill -9 9220
   suse:~ #kill -9 9216
- Back To Top
- Setting up the Samba Web Administration Tool.
- First edit the /etc/services file to add a line for the swat TCP port.
suse:~ # vi /etc/services
Add swat 901/tcp # Swat port to the file.
                       [file clipped for brevity]
klogin          543/tcp                         # Kerberized `rlogin' (v5)
kshell          544/tcp                         # Kerberized `rsh' (v5)
kerberos-adm    749/tcp                         # Kerberos `kadmin' (v5)
#
webster         765/tcp                         # Network dictionary
webster         765/udp
swat            901/tcp                         # Swat port

ingreslock      1524/tcp
ingreslock      1524/udp
                       [file clipped for brevity]
- Edit the /etc/inetd.conf file, and look for a reference to swat, if you edit the inetd.conf file you will have to send the inetd daemon a signal to cause it to reread its configuration file ( kill -HUP {pid} ).
suse:~ # vi /etc/inetd.conf
Editing inetd.conf to use the newer version of swat.
                       [file clipped for brevity]
# swat is the Samba Web Administration Tool
 swat   stream  tcp     nowait.400      root    /usr/local/samba/bin/swat       swat
#
                       [file clipped for brevity]
- Connecting to swat
| Location Connecting from |
Path in Browser |
| Localhost |
http://localhost:901 |
| Remote host (with DNS) |
http://{Fully Qualified Domain Name}:901/ |
| Remote host (without DNS) |
http://{IP address}:901/ |
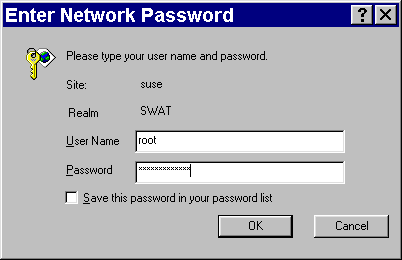
- When you connect you will be prompted with a verification box. Enter a valid user/password to access the swat web pages.
- Back To Top
- SMBMOUNT
- First you need to make sure that you have the smbfs supported in your kernel. If you haven't done it in a while, you might as well update your
kernel when you recompile it to add smb file system support.
- Mounting a Windows share with smbmount
Usage:
mount.smbfs service mountpoint [-o options,...]
Example: connecting to the windoze machine called earth2 as user admin and mounting the windoze's temp as /share3.
   suse:~ # mount.smbfs //earth2/temp /share3 -o username=admin
   Password:
   suse:~ #
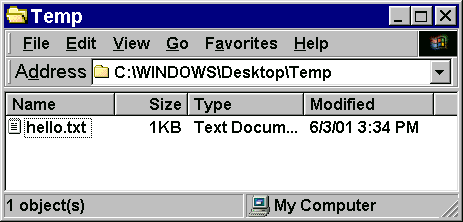
Test: create a file called hello.txt from the Linux server and put some text in it.
   suse:~ # cd /share3
   suse:/share3 # touch hello.txt
   suse:/share3 # echo Hello > hello.txt
   suse:/share3 # date >> hello.txt
   suse:/share3 #
Results: file created from a Linux server is created in a windoze share.
- Unmount the windoze share with the smbumount command
suse:~ # smbumount /share3
- Back To Top
- Questions?
Email Me
BACK |


